Objective:
In this article we will be talking about how you can add and utilize custom Sources within the Opportunities module of Core iQ. We will explore the following topics:
- How to create a brand-new Source for something like an event or other function
- How to add those Sources to Opportunities
- How to find Opportunities relating to those Sources through Core iQ reporting
How to create new Source data for Opportunities in Core iQ
If you are currently using the Opportunities module of Core iQ to manage your prospect communications, you might be wondering how you can more effectively organize your data. One very important method for categorizing your list of prospects is through the use of custom Source data. You can easily assign user created Sources to some or all of your prospects in order to further segment them based on a variety of items.
The most typical use for these Sources is to break out the event or initiative that lead to those prospects being created. That’s why we are going to be walking through creating a set of custom Sources for a few events that are being held, giving us a chance to break those customers back out in order to follow up with them later. The first thing we want to do is to head to the Custom Field Definitions area of the Admin menu. In this section, you can create a number of different custom merge fields for use within Core iQ. In this case, we will want to use the ‘Set List Criteria’ to find the relevant Opportunity Source list. There are a number of different groupings of Sources, ranging from Branch Sources to Website Sources. In this case, since we are hosting the event at our branches, we will navigate to the Opportunity Branch Source list.
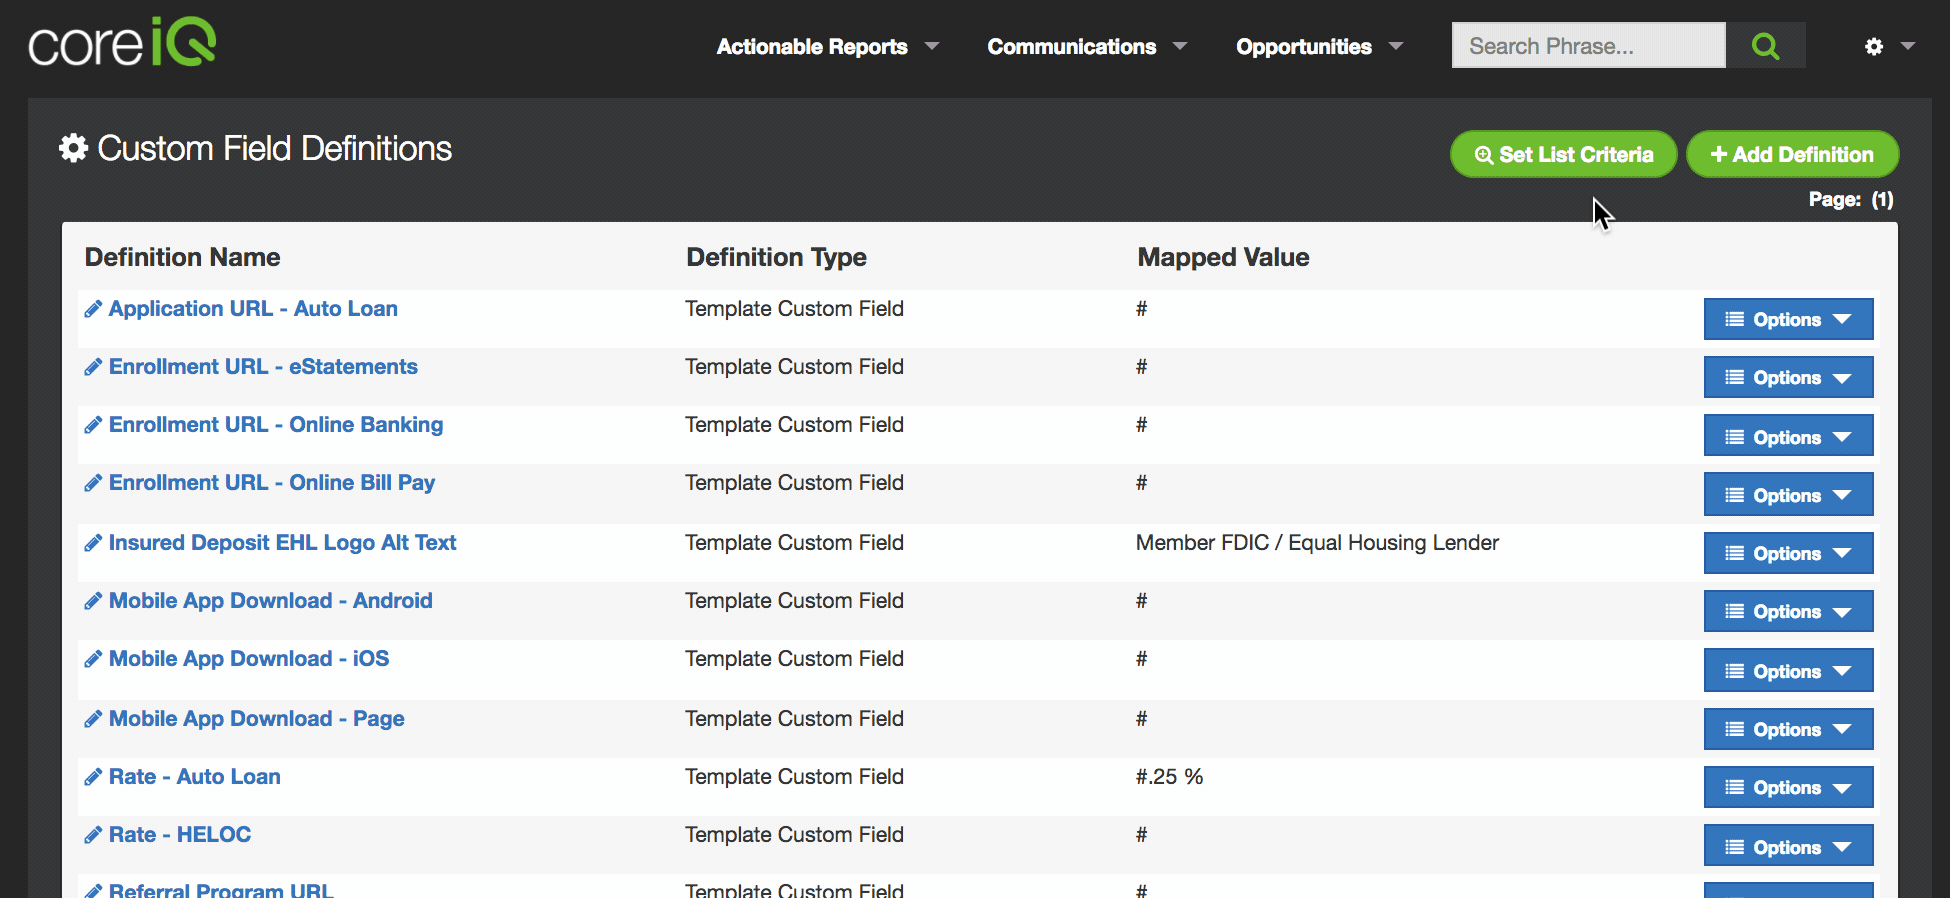
From here, we can see all of our Branch Sources currently in use within the Opportunities module. We can easily use the Add Definition button to create one or more custom Sources, assigning each to the Opportunity Branch Source list. You can even change the order in which these Sources are displayed within the dropdown menu. Once you have created your custom Sources, it's time to start using them within your Core iQ prospects.
How to Add Sources to Core iQ Opportunities
When you go to create a new Opportunity within Core iQ, you will see that there is a section entitled “How did the Opportunity Originate?” This is the area that you can use to assign your new custom Sources when creating a brand-new prospect. Just select Branch as the main Source for your Opportunity, and use the Source Details dropdown to find one of your custom Sources. This new data will be used to categorize your prospect, and now we can use Core iQ’s reporting capabilities to segment these Opportunities much easier.
You can even retroactively assign these custom Sources to prospects. So, if you forgot to create a custom Source and have already uploaded all of your Opportunities, you can go through to reassign their Source to the newly created custom item. These changes take immediate effect and you can re-segment customers on Core iQ reporting as soon as their new Source is added.
How to Find Custom Sources through Core iQ Reporting
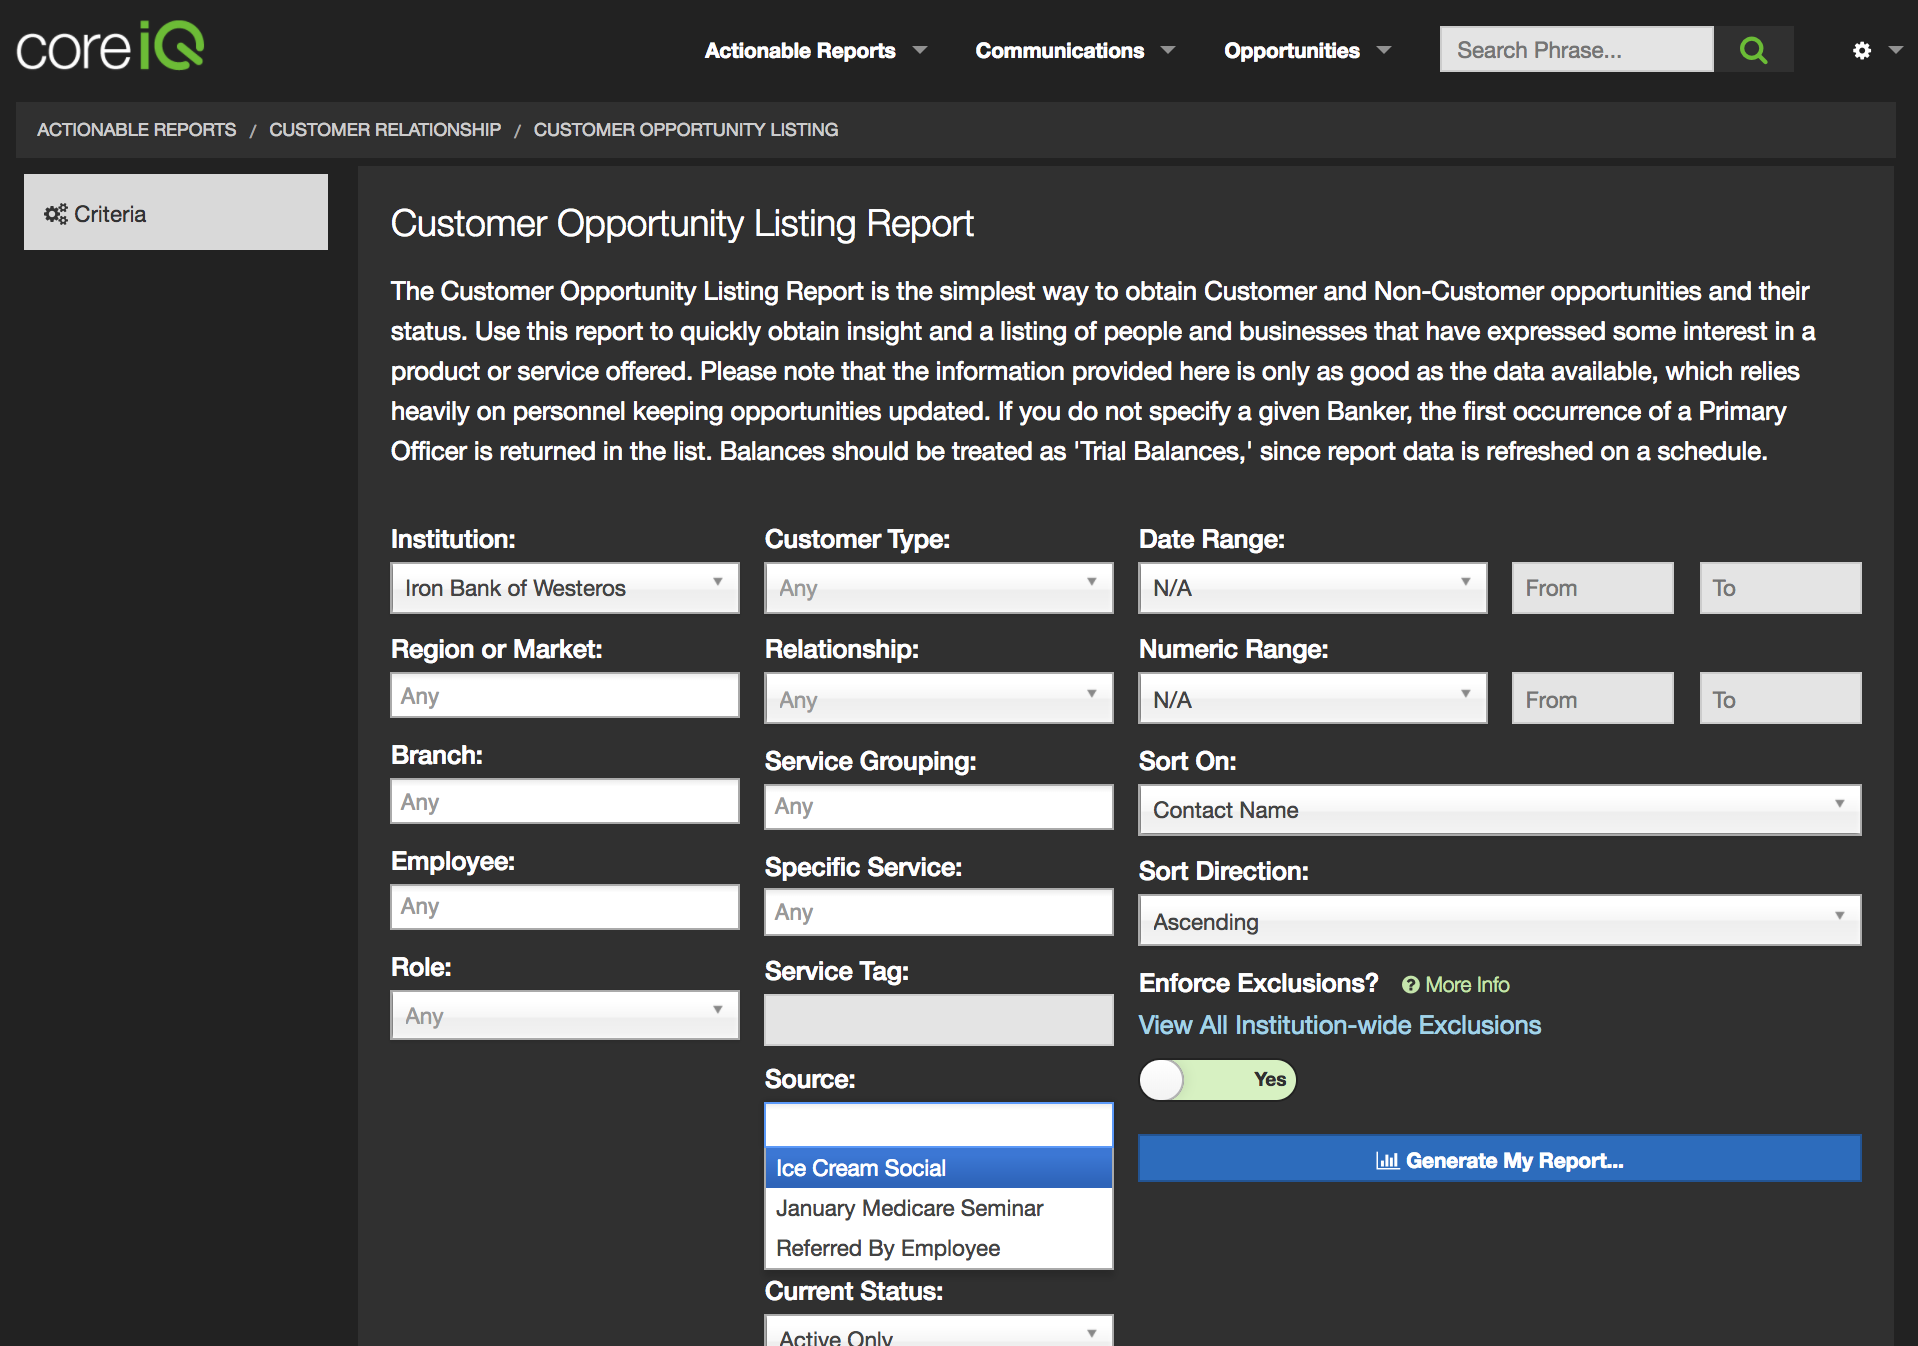
When you want to find these prospects at a later date in order to send a communication regarding the event that they attended, or possibly a new event that you want them to attend, you can use our Customer Opportunity Listing report. Within the middle section of this report, you will see a dropdown menu item entitled Source. You can use this area to choose the Source(s) that you want to query upon, and then run your report to gather a list of relevant prospects. This is perfect for sending marketing communications to customers, and allows you to pre-segment prospects for future offers.